The 5 Most Underrated Accessory Exercises That Could Add 50 Pounds to Your Powerlifting Total
Most powerlifters are leaving significant gains on the platform simply because they’re overlooking some of the most effective accessory exercises available. While the spotlight typically falls on variations of the squat, bench press, and deadlift, the real secret to breaking through performance plateaus often lies in strategic accessory work that addresses the underlying stability, strength, and mobility limitations that hold back your main lifts.
In this comprehensive guide, I’m going to walk you through five accessory exercises that have the potential to add substantial pounds to your total in as little as six to eight weeks when implemented correctly. These movements might not look particularly impressive on social media, and you might even be familiar with some of them already, but the difference lies in how you execute them and integrate them into your training program. Many powerlifters perform watered-down versions of these exercises without understanding how to properly progress them or maximize their carryover to the competition lifts.
The exercises I’ve selected address critical components that directly impact powerlifting performance: core stability and bracing mechanics, upper back thickness and lat strength, unilateral leg strength and hip stability, tricep development for lockout strength, and anti-lateral flexion capacity with grip endurance. Each of these elements plays a non-negotiable role in your ability to move maximal loads safely and efficiently, yet they’re frequently undertrained or trained ineffectively in many powerlifting programs.
You can also watch the video below that goes along with this article.
Understanding the Role of Accessory Work in Powerlifting
Before we dive into the specific exercises, it’s important to understand what makes an accessory exercise truly valuable for powerlifters. The goal isn’t simply to add more volume or create muscular fatigue. Effective accessory work should address specific weaknesses in the kinetic chain, improve force transfer efficiency, build muscle in areas that directly support the competition lifts, or enhance positional strength that translates to better performance under maximal loads.
Many powerlifters fall into the trap of selecting accessory exercises based on what feels hardest or creates the most soreness rather than what actually improves their weak links. The exercises I’m sharing today have been selected specifically because they target common limitations that show up repeatedly in powerlifting populations: insufficient core stability under load, inadequate upper back development, bilateral strength imbalances, underdeveloped tricep strength relative to pressing demands, and poor anti-lateral flexion capacity.
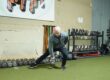
Exercise One: The Weighted Dead Bug for Absolute Core Stability
The dead bug exercise is often dismissed by intermediate and advanced lifters as a beginner’s movement, something you might see in a general fitness class but not in a serious powerlifting gym. This perspective represents a fundamental misunderstanding of what the dead bug is designed to accomplish and how it can be progressed to challenge even the strongest athletes.
The dead bug trains anti-extension core stability, which is the ability to resist spinal extension while maintaining neutral alignment under load. This capacity is absolutely critical when you’re trying to maintain proper positioning during a maximal squat or deadlift. When your core stability is insufficient, you’ll experience energy leaks in the force transfer chain, typically manifesting as excessive spinal extension during squats or a loss of neutral spine position during the setup and pull of a deadlift. These positional breakdowns don’t just rob you of pounds on the platform—they also significantly increase injury risk.
The standard bodyweight dead bug that most people are familiar with involves lying supine with your arms extended toward the ceiling and your knees bent to 90 degrees, then alternating extending opposite arm and leg while maintaining a flat lower back against the floor. While this version has value for teaching the fundamental bracing pattern, it quickly becomes too easy for anyone who’s been training seriously for more than a few months.
To make the dead bug appropriately challenging for powerlifters, you need to add external resistance that forces your core to work significantly harder to maintain position. My preferred method is the banded dead bug variation. Take a resistance band and create handles on each end, then position yourself on the floor and reach overhead to grab the band, pulling it down over your shoulders as if you were performing a straight-arm lat pulldown. This setup immediately engages your lats, which are crucial stabilizers during both squats and deadlifts, while simultaneously increasing the demand on your anterior core.
From this position with the band tensioned overhead, bring your knees up into the standard dead bug position and begin performing slow, controlled repetitions. Extend one leg while maintaining the band tension and keeping your lower back completely flat against the floor, hold for a two-second count, then return to the starting position and repeat on the opposite side. The addition of the band creates a much more demanding anti-extension challenge, and you’ll likely find yourself shaking as you fight to maintain position—this is exactly what we want.
The alternative progression uses a dumbbell held overhead, typically around ten to twenty percent of your bodyweight. Hold the dumbbell with both hands and press it toward the ceiling, then bring it back overhead as far as you can while keeping your lower back flat. As you reach the dumbbell overhead, simultaneously extend the opposite leg, creating a diagonal pattern of movement. This variation is particularly effective because it combines anti-extension demands with rotational stability requirements as you control the asymmetric load.
The carryover from properly executed weighted dead bugs to powerlifting performance is substantial. First, you’re developing the reflexive bracing pattern that needs to activate instantaneously when you unrack a heavy squat or initiate a deadlift pull. Second, you’re training your core to maintain position under tension for extended periods, which directly translates to maintaining proper spinal alignment throughout an entire lift. Third, you’re strengthening the integration between your lats and core, creating a more effective kinetic chain for force transfer.
I recommend implementing dead bug variations either as part of your warm-up before squats and deadlifts or as dedicated core work at the end of your training session. When used as a warm-up, perform two to three sets of six to eight repetitions per side with moderate resistance to activate the bracing pattern without creating fatigue. When used as primary core training, push for three to four sets of ten to twenty second holds per side with substantial band tension or heavy dumbbells. The key is making the exercise genuinely challenging—if you can easily complete your sets without significant effort, you need to increase the resistance.
Exercise Two: The Kroc Row for Building an Imposing Upper Back
The Kroc row, popularized by powerlifting legend Matt Kroczaleski (now Janae Kroczaleski), represents one of the most effective methods for building the thick, dense upper back musculature that powerlifters need for optimal performance across all three lifts. This exercise diverges from traditional dumbbell row technique by intentionally incorporating momentum and body English to allow you to handle significantly heavier loads than you could move with strict form.
The reasoning behind this approach is straightforward: while strict rowing variations have their place in training, the Kroc row specifically targets muscular overload and hypertrophy in the upper back, lats, traps, and rear delts by exposing these muscle groups to supramaximal loads they wouldn’t otherwise experience. The heavy eccentric component and high repetition ranges create substantial mechanical tension and metabolic stress, both of which are powerful drivers of muscle growth.
For powerlifters, a thick upper back serves multiple critical functions. During squats, increased upper back and trap development creates a larger, more stable shelf for the barbell to rest on, allowing you to maintain better positioning throughout the lift and reducing the tendency for the bar to shift or roll. The stronger your upper back, the less likely you are to experience forward lean or spinal flexion under heavy loads. For deadlifts, lat and upper back strength is essential for maintaining tension on the bar throughout the pull and preventing the bar from drifting away from your body, which dramatically increases the difficulty of the lift. In the bench press, your upper back forms the stable base from which you generate pressing force—a bigger, stronger back translates directly to more weight moved.
To perform the Kroc row correctly, select a dumbbell that’s substantially heavier than what you would typically use for standard rowing work. If you normally row with a seventy-pound dumbbell for controlled repetitions, you should be reaching for ninety to one hundred pounds or more for Kroc rows. You may need to use lifting straps to maintain your grip throughout the set, which is completely acceptable since grip strength is not the limiting factor we’re trying to train in this exercise.
Position yourself with one knee and one hand on a flat bench for support, with your torso roughly parallel to the ground. Grip the heavy dumbbell with your free hand and allow it to hang straight down, fully stretching your lat and upper back. From this stretched position, explosively heave the dumbbell upward, allowing your torso to rotate and using momentum to help drive the weight up as high as possible. The goal is not to maintain perfect, strict form but rather to move as much weight as possible through the rowing pattern while still maintaining control of the eccentric portion.
The eccentric phase of each repetition should be controlled but not excessively slow—lower the weight under control back to the starting position, then immediately begin the next repetition. Kroc rows are characterized by high repetition ranges combined with heavy loads, creating a uniquely demanding training stimulus. Plan for sets of fifteen to twenty-five repetitions per arm, which will test not only your muscular endurance but also your mental fortitude as the sets progress and fatigue accumulates.
Due to the demanding nature of this exercise, I recommend programming Kroc rows at the end of your training session after all your primary and secondary work is complete. Perform two to three sets per arm with maximal intensity, and don’t be surprised if you feel completely spent afterward—that’s the intended effect. The combination of heavy loads, high reps, and accumulated fatigue creates a powerful stimulus for upper back growth that you’ll feel for days afterward.
Exercise Three: Bulgarian Split Squats for Unilateral Leg Development
The Bulgarian split squat, also known as the rear-foot-elevated split squat, is an exercise that many powerlifters avoid because it’s uncomfortable, humbling, and exposes strength imbalances that might otherwise remain hidden. However, these are precisely the reasons why it’s so valuable for improving your squat and deadlift performance.
Powerlifting is inherently a bilateral sport—all three competition lifts involve both legs working together to move the load. While this makes sense from a performance perspective, it also means that many powerlifters develop subtle but significant imbalances between their left and right sides. The stronger leg will naturally compensate for the weaker one during bilateral movements, allowing the imbalance to persist or even worsen over time. These asymmetries can limit your total strength potential and increase injury risk by creating uneven loading patterns through your spine and hips.
The Bulgarian split squat forces each leg to work independently, eliminating the possibility of compensation and ensuring that both sides develop proportionally. Beyond addressing imbalances, this exercise capitalizes on the bilateral deficit phenomenon, which describes the observation that the sum of your single-leg strength potential exceeds your bilateral strength. In practical terms, this means that if you can squat five hundred pounds bilaterally, you should theoretically be able to Bulgarian split squat significantly more than two hundred fifty pounds per leg. By training each leg to handle heavier loads independently, you create a strength reserve that carries over to improved bilateral performance.
To set up the Bulgarian split squat, you’ll need an elevated surface approximately knee height—a bench, plyo box, or specialized split squat pad all work well. Place the top of one foot on the elevated surface behind you and step forward with your other leg, positioning yourself so that when you descend into the bottom position, your front shin remains relatively vertical and your front knee tracks over your toes. The exact stance width and distance from the bench will vary based on your individual limb lengths and mobility, so experiment to find what allows you to achieve good depth while maintaining balance.
For loading options, you have several effective choices. Holding a single dumbbell in the hand opposite to your working leg (contralateral loading) creates a stability challenge and works your obliques as you resist lateral flexion. Holding a dumbbell in a goblet position at chest height tends to keep your torso more upright and is often easier to balance. You can also use a barbell across your back, which allows you to load the movement most heavily but requires more coordination and stability. Start with dumbbells or a goblet position while you’re learning the movement pattern, then progress to barbell loading as you become more proficient.
Descend slowly and under control until your rear knee approaches the floor and your front thigh is roughly parallel to the ground, then drive forcefully through your front leg to return to the starting position. Focus on maintaining an upright torso position throughout the movement and avoiding excessive forward lean. You should feel the work primarily in your front leg’s quad, glute, and hamstring, with some stretch in the hip flexor of your rear leg.
This hip flexor stretch is actually another significant benefit of the Bulgarian split squat for powerlifters. Many powerlifters develop tight hip flexors from spending long periods in flexed hip positions during squats and extensive sitting outside the gym. Tight hip flexors can pull your pelvis into anterior tilt and limit your ability to achieve optimal positioning in both squats and deadlifts. The Bulgarian split squat provides a loaded stretch that helps maintain or improve hip flexor length while simultaneously building strength.
Program Bulgarian split squats for two to four sets of eight to twelve repetitions per leg, performing them after your primary squat or deadlift work but before smaller isolation exercises. Use challenging loads that make the final few reps of each set genuinely difficult—this isn’t a movement where you should leave significant reps in reserve. Many powerlifters are surprised by how demanding properly executed Bulgarian split squats can be, even when using loads that seem modest compared to their bilateral squat weights.
Exercise Four: The JM Press for Crushing Tricep Strength
Named after legendary bench presser JM Blakeley, the JM press is a hybrid movement that combines elements of a close-grip bench press with a skull crusher to create one of the most effective exercises for building the kind of thick, powerful triceps that drive bench press performance. Despite its proven effectiveness, this exercise remains underutilized in many powerlifting programs, which is unfortunate because tricep strength is often a significant limiting factor in bench press progression.
The triceps play a critical role throughout the entire bench press range of motion, but they’re particularly important during the transition from the bottom position and the lockout phase. Insufficient tricep strength manifests as difficulty getting the bar moving off the chest, struggling through the midpoint of the press, or failing to complete the lockout. Building stronger, more muscular triceps addresses all of these potential weak points while also improving your ability to stabilize the bar throughout the pressing motion.
The JM press specifically targets the long head of the tricep, which originates on the scapula and crosses both the shoulder and elbow joints. This is the largest of the three tricep heads and the one that contributes most substantially to pressing strength. The unique movement pattern of the JM press allows you to load the long head heavily while maintaining constant tension throughout the range of motion.
To perform the JM press, set up on a flat bench as you would for a standard bench press, but take a closer grip with your hands positioned approximately shoulder-width apart. I prefer using a false grip (thumbless grip) for this exercise as it tends to reduce wrist strain and allow for better elbow positioning, but you can also use a traditional grip with your thumbs wrapped around the bar if that feels more comfortable or secure.
Unrack the bar and position it over your chest as you would for a normal bench press. As you begin to lower the bar, the movement diverges from a standard press—instead of bringing the bar straight down to your chest, you’ll allow it to travel down and slightly back toward your face, similar to the path it would take during a skull crusher. However, unlike a pure skull crusher where your upper arms remain perpendicular to the floor, in the JM press you’ll maintain your elbows at a higher position, creating an angle that falls between a close-grip press and a skull crusher.
The bar should end up somewhere in the region between your lower chest and your chin, depending on your individual proportions and mobility. From this bottom position, press the bar back up and slightly forward to the starting position, again maintaining elevated elbow positioning throughout the movement. Your elbows should never flare out to the sides as they might in a regular bench press—they should stay pointing more toward your feet throughout the entire range of motion.
The JM press can be loaded relatively heavily, and you should treat it as a serious strength-building exercise rather than a light accessory movement. Aim for three to four sets of six to ten repetitions, using a weight that challenges you within this rep range. Due to the technical demands of the exercise and the coordination required, perform JM presses after your primary bench press work is complete but while you’re still relatively fresh. Attempting to perform them when you’re excessively fatigued increases the risk of form breakdown and reduces the training effect.
As you become proficient with the movement, you’ll likely feel a deep, intense contraction in the meaty portion of your triceps near the elbow. This is exactly where you want to develop strength and size for improved bench press performance. Many powerlifters who incorporate regular JM press work report noticeable improvements in their off-the-chest strength and their ability to drive through sticking points in the middle portion of the bench press.
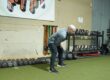
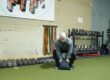
Exercise Five: Suitcase Carries for Bulletproof Core Stability and Grip
The suitcase carry, also known as the single-arm farmer’s carry, is one of the most comprehensive accessory exercises available to powerlifters because it simultaneously addresses multiple physical qualities that directly impact performance while also promoting joint health and long-term training sustainability. This deceptively simple exercise involves walking while carrying a heavy load in just one hand, which creates an asymmetric challenge that forces your core, hips, and stabilizing muscles to work intensely to maintain proper positioning.
When you carry a heavy weight in one hand while walking, gravity attempts to pull you sideways toward the loaded side. Your core musculature, particularly your quadratus lumborum, internal and external obliques, and deep spinal stabilizers, must engage forcefully to prevent lateral flexion and keep your torso vertical. This anti-lateral flexion capacity is directly applicable to maintaining proper positioning during squats and deadlifts, where any deviation from neutral spine alignment represents wasted force and increased injury risk.
Beyond core stability, suitcase carries build grip strength and endurance through sustained isometric contraction. While powerlifters typically focus on hook grip or mixed grip strength for deadlifts, general grip endurance benefits all three lifts by improving your ability to maintain tension and connection with the bar. The extended time under tension during carries creates a different stimulus than the brief maximal efforts of competition lifts, building both strength and muscular endurance in your forearms and hands.
Perhaps less obviously, suitcase carries also improve hip mobility, particularly internal rotation. As you walk with a weight in your right hand, each time you step forward with your left leg, your left hip must internally rotate to allow your pelvis to move properly. This repeated internal rotation under load helps maintain or improve hip mobility, which many powerlifters lack due to the external rotation bias of squat and deadlift positions. Better hip mobility translates to easier access to optimal starting positions and reduced compensatory movement patterns.
To perform suitcase carries effectively, select a heavy kettlebell or dumbbell—you should be using significantly more weight than you might expect, often fifty percent or more of your bodyweight for trained individuals. Pick up the weight and stand tall with your shoulders level and your torso completely vertical. Your free arm can hang naturally at your side or you can place your hand on your hip to help monitor whether you’re maintaining level shoulders.
Begin walking slowly and deliberately, focusing intently on maintaining perfect posture throughout. Your shoulders should remain level without hiking the loaded side or dropping the unloaded side. Your torso should stay perfectly vertical without any lateral lean. Your stride should be controlled and even, not rushed or choppy. The goal is not to cover distance quickly but rather to maintain impeccable positioning while under load for the duration of the carry.
The temptation will be to lean away from the weight or to allow your shoulder to hike up on the loaded side, but resist these compensatory patterns. The entire value of the exercise comes from fighting to maintain neutral alignment against the asymmetric load. If you find yourself unable to maintain good positioning, the weight is too heavy or you’ve accumulated too much fatigue—rest, recover, and continue with better positioning or reduced load.
Program suitcase carries for two to four sets of ten to thirty yards per side, and consider implementing them either as part of your warm-up before lower body training or as finisher work at the end of your session. When used as a warm-up, they help activate your core stability and prepare your body for the demands of loaded movement. When used as a finisher, they provide additional core strengthening work while also challenging your grip endurance and mental toughness when you’re already fatigued.
Implementing These Exercises Into Your Program
Now that you understand how to perform each of these five accessory exercises and why they’re valuable for powerlifting performance, the question becomes how to actually integrate them into your existing training program without creating excessive fatigue or interfering with your primary work.
My recommendation is to start by selecting two, perhaps three of these exercises that address your most significant weaknesses or needs. If you struggle with maintaining bracing during squats or deadlifts, prioritize the dead bug variations and suitcase carries. If your bench press is limited by lockout strength, make the JM press a priority. If you have mobility restrictions or bilateral imbalances, emphasize Bulgarian split squats. If you need to build overall upper back mass, incorporate Kroc rows.
Implement your selected exercises for a focused four to eight week training block, giving your body time to adapt to the new stimuli and allowing you to assess the carryover to your main lifts. After this initial implementation period, you can rotate in one or two additional exercises from the list while potentially removing ones that have served their purpose.
Pay careful attention to exercise placement within your training sessions. Core stability work like dead bugs and suitcase carries can be performed either during warm-ups or as accessory work after main movements. Upper back work like Kroc rows should come after your primary pressing and pulling movements. Bulgarian split squats belong after your main squat or deadlift work but before smaller isolation exercises. JM presses should follow your primary bench press work while you’re still relatively fresh.
Most importantly, prioritize quality execution over simply completing the prescribed sets and reps. Many powerlifters rush through accessory work or treat it as an afterthought, but the exercises I’ve outlined deserve focused attention and maximal effort. The dead bugs should be genuinely challenging, requiring intense concentration to maintain position. The Kroc rows should test your mental fortitude as fatigue accumulates. Bulgarian split squats should leave your legs burning. The JM press should build serious tricep strength. Suitcase carries should demand constant vigilance to maintain positioning.
When performed with appropriate intensity and attention to detail, these five exercises have the potential to address common weak links, build supporting musculature, and improve movement quality in ways that directly translate to pounds added to your competition total. The key is consistency, progressive overload, and patient accumulation of adaptation over weeks and months of dedicated training.
Need help with your powerlifting training? Contact us to see how we can help you!