
Standing Rack-Supported Hip CARs: A Simple Drill for Bulletproof Hip Mobility
If your hips feel stiff before you squat, locked up halfway through a wrestling match, or just generally cranky after years of sitting and training, the standing rack-supported hip CAR might be one of the most valuable two-minute investments you can make. It requires almost nothing — just something sturdy to hold onto — and it directly targets the full range of motion your hip is capable of producing. It’s a staple in our toolbox at THIRST Gym precisely because it’s simple, scalable, and delivers a noticeable change in how your hips move, often within a single set.
Let’s break down what this drill is, why it works, how to perform it correctly, and where it fits into your training.
Watch the video below on how to maximize this exercise.
What “CARs” Actually Means
CAR stands for controlled articular rotation. That phrase is doing a lot of heavy lifting, so it’s worth unpacking. “Controlled” means you, not momentum, are dictating the movement — every degree of motion is owned and intentional. “Articular” refers to the joint itself, in this case the hip. And “rotation” describes the goal: taking the joint through the largest circle of motion it can actively produce.
That word active is the entire point. A lot of mobility work is passive — you sink into a stretch, gravity or a band pulls you deeper, and you wait. There’s a time and place for that, but it teaches your body very little about controlling the range you’re accessing. A CAR flips the script. You’re using your own hip musculature — your glutes, hip flexors, rotators, and surrounding tissue — to pull the joint into and through its end ranges. You’re not just borrowing range of motion; you’re building the strength and neurological control to actually use it. That’s the difference between flexibility you can show off and mobility you can perform with.
Why Hip Mobility Matters More Than You Think
The hip is a ball-and-socket joint, which means it’s designed to move in every direction: flexion (knee toward chest), extension (leg behind you), abduction (leg out to the side), adduction (leg across the body), and both internal and external rotation. Most of us live in a tiny fraction of that available range. We sit, we walk forward, we squat and deadlift in the sagittal plane, and the rotational and lateral capacities of the hip slowly go dormant.
When a joint stops visiting its end ranges, the body treats those ranges as unsafe and clamps down on them. That’s where you start to feel “tight.” Restore active control of those ranges and a cascade of good things tends to follow: better squat depth, a cleaner hip hinge, more powerful change of direction, and far less compensatory stress dumped onto the low back and knees. For athletes who rotate, scramble, and create force from awkward positions — wrestlers, grapplers, MMA fighters — hip mobility isn’t a luxury. It’s the foundation of staying healthy and being hard to move.
How to Perform the Standing Rack-Supported Hip CAR
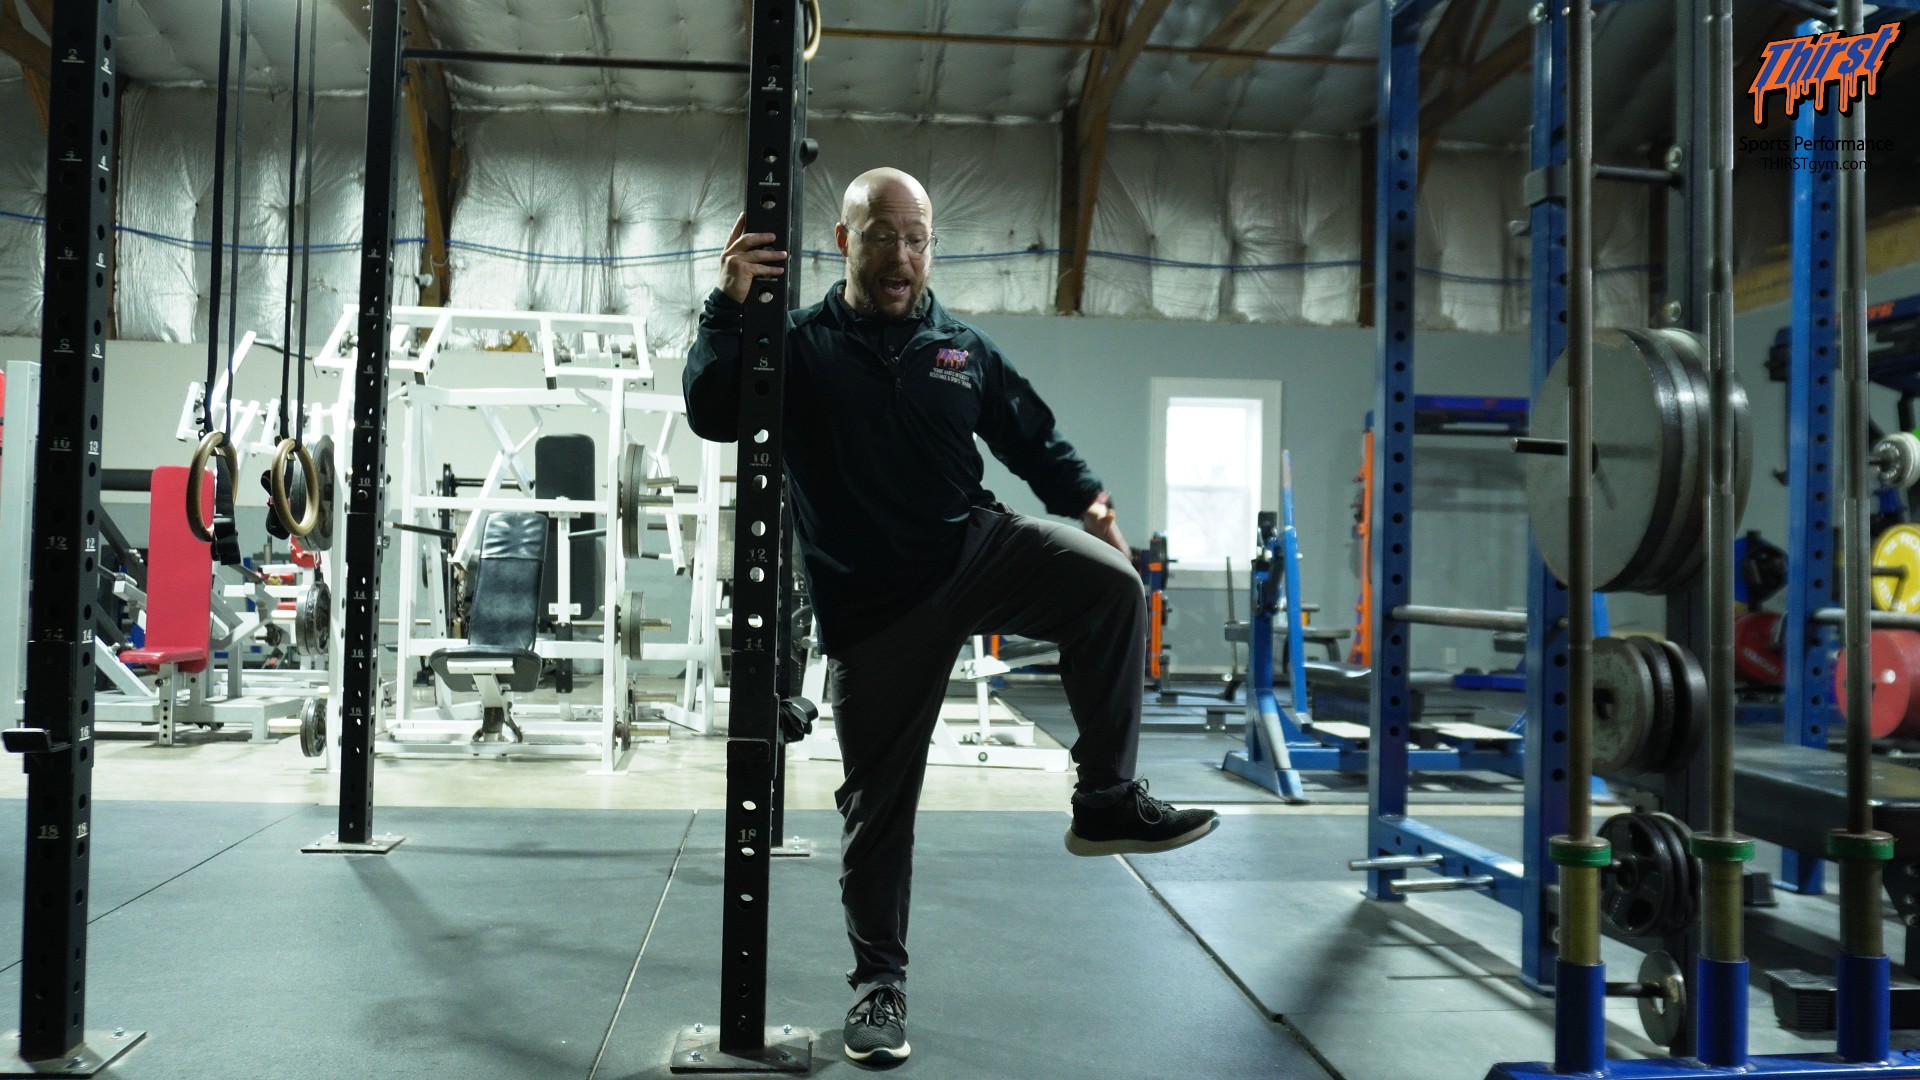
Set up next to a power rack, squat stand, or any solid vertical upright. A door frame at home works perfectly fine too — the support just needs to be sturdy. Stand close enough that you can rest a hand on it for balance. The leg closest to the rack is your support leg; the leg furthest from the rack is the one doing the work.
Here’s a key coaching point right away: use the rack for balance, not for leverage. Don’t hang your bodyweight off of it or lean into it to cheat extra range. The support is there so you can stay tall and let the working hip do its job without worrying about toppling over. Stay stacked over your support foot, keep a little tension through your trunk, and resist the urge to collapse into the rack.
You can begin with either flexion or extension — it genuinely doesn’t matter which direction you start. Personally, I like to start in extension because that’s the range I’m most limited in, and it’s smart to give your stiffest direction your freshest attention. Whatever you choose, the movement is one continuous, slow circle around the hip joint.
Starting from extension, drive the working leg back behind you as far as you can. You should feel your glute and hamstring switch on as you actively reach that leg backward — that’s exactly what you want. From that extended position, begin to open the leg out to the side, almost like you’re slowly lifting it over an imaginary hurdle. Lift the knee up and out as high as your hip will allow, then bring the leg around to the front into flexion, knee climbing toward your chest.
This is where the magic — and the challenge — happens. To continue the circle from that high, flexed position, you have to introduce internal rotation. Think about quietly turning the shin and ankle inward and upward at the top, staying as high as you can while you do it. Almost everyone discovers their range here is far smaller than they assumed, and that’s useful information. Maintain that height, rotate through, then reverse the path back down into extension to complete the rotation.
Then simply reverse the whole sequence to go the other direction, and continue cycling smoothly between extension and flexion. Move slowly throughout. The entire value of this drill lives in the control. If you’re rushing, you’ve turned a CAR into a leg swing, and a leg swing teaches your hip almost nothing.
Once you’ve finished your reps on one side, switch your stance and repeat on the other leg.
Common Mistakes to Watch For
The most frequent error is speed. People treat the drill like a dynamic warm-up swing and blast through it with momentum. Slow down — controlled is in the name. The second most common issue is leaning into the rack and using it to crank into ranges your hip can’t actively reach on its own. That feels productive but defeats the purpose; you want active end range, not borrowed end range. The third is skipping the rotational components — quietly avoiding the internal rotation at the top of flexion because it’s hard. That hard part is exactly the range most of us need most, so don’t cut the circle short.
How to Program It
One of the best things about this drill is its flexibility. It fits almost anywhere.
As a warm-up, it’s excellent before you squat, deadlift, sprint, or do anything athletic. A round or two on each leg primes the hips to access the ranges you’re about to load. As a mobility filler, it shines between sets of your main strength work — you’re already resting, so rather than scrolling your phone, fill that time cycling through a few slow reps and you’ll often feel your positions improve set to set. And on off days or dedicated mobility days, it’s a low-stress way to keep the hips happy without taxing your recovery; mix it into a flow with other movements.
On reps, less is more here because each one is slow and deliberate. As a filler between strength exercises, three controlled reps per direction on each side is a sweet spot — start from the back, complete the full circle, and that counts as one. On a warm-up or mobility day, one to two reps per side blended into the rest of your prep works well. Across the board, the goal isn’t to rack up volume; it’s to be genuinely present with what your hip is doing on every single rep.
Who This Is For
The honest answer is almost everyone. Powerlifters get cleaner squat and deadlift positions and offload some of the strain that otherwise migrates to the low back. Wrestlers, grapplers, and combat athletes build the rotational hip control that makes the difference between scoring and getting scored on. General fitness clients who sit all day reclaim ranges that desk life quietly stole. And coaches get a dead-simple assessment and warm-up tool that needs no special equipment and exposes exactly where an athlete’s hips are limited.
Stick with it consistently and you’ll watch your range of motion improve — often within the set, and meaningfully over the weeks and months. That’s the beauty of training mobility actively: you’re not just feeling looser, you’re building hips you can actually control and rely on.
If you’ve got questions about fitting this into your program, drop a comment or reach out — I’m always happy to help you move better.