The Band-Resisted Cat-Camel: A Smarter Way to Build Thoracic Mobility
The cat-camel is one of the most widely prescribed mobility drills in the world, and for good reason. It teaches segmental control of the spine, encourages healthy movement between flexion and extension, and asks almost nothing of you in terms of equipment or skill. But if you’ve been doing the standard bodyweight version for any length of time, you’ve probably run into the same wall a lot of trained lifters and athletes hit: it stops doing much. The movement starts to feel easy, even redundant, and you finish a set without really feeling like you accomplished anything. That’s the exact problem the band-resisted cat-camel was built to solve.
By adding a light to moderate resistance band across the mid-back, you turn a passive, low-demand drill into something that actively challenges your thoracic spine, recruits your core, and gives you a little assistance into ranges of motion you might not reach on your own. It’s a simple modification, but it changes the exercise in meaningful ways. Below is a complete breakdown of what the drill is, why it works, how to perform it correctly, and where it fits into a smart training program.
Watch the video below on how to maximize this exercise.
What Is the Band-Resisted Cat-Camel?
The cat-camel — sometimes called the cat-cow or cow-camel, though the name doesn’t matter much — is a quadruped spinal mobility exercise. You move on your hands and knees, alternating between rounding the back (flexion, the “cat” position) and arching it (extension, the “camel” or “cow” position). The goal is to move the spine segment by segment, training your ability to flex and extend with control rather than moving everything as one rigid block.
The band-resisted version keeps that exact movement pattern but loops a resistance band over your mid-back. As you round and reach, the band resists the rounding, forcing the muscles responsible for that motion to work harder. As you arch, the band pulls you down into a deeper extension than you’d typically reach unassisted. So in one drill you get two distinct benefits: added resistance in one direction and added assistance in the other. That dual quality is what makes this such an effective progression once bodyweight cat-camels stop delivering.
Why Thoracic Mobility Matters So Much
The thoracic spine — the twelve vertebrae of your mid-back that the ribs attach to — is meant to be one of the most mobile regions of your spine. It should rotate, flex, and extend freely. In reality, modern life conspires to lock it down. Hours spent seated, hunched over a phone or a keyboard, gradually train the upper back into a flexed, stiff posture. For athletes and lifters, a stiff thoracic spine doesn’t just look bad; it leaks into nearly everything you do.
A mid-back that won’t extend properly forces compensation elsewhere. The lumbar spine starts taking on extension it wasn’t designed to handle, the shoulders lose their ability to fully flex overhead, and pressing and overhead movements start to feel cramped and restricted. Restoring thoracic mobility tends to make a wide range of upper-body work feel cleaner and more comfortable. Many lifters report that their mid-back simply “feels better” during pressing, rowing, and overhead movements after consistently training thoracic extension — which is exactly the kind of feedback this drill tends to produce.
The Muscles and Mechanics Behind the Drill
What makes the banded version more than just a fancier mobility drill is the muscular work it adds, particularly on the rounding phase. As you push your mid-back up into the band and reach your hands forward, you’re loading the serratus anterior — the muscle that wraps around the ribs and helps the shoulder blades glide and upwardly rotate. Healthy serratus function is critical for overhead pressing and for protecting the shoulder, and it’s a muscle most people never train directly. The protracting, reaching action against band resistance lights it up.
At the same time, that reach combined with an exhale draws in the internal obliques and the deep abdominal wall. When you round the back, posteriorly tilt the pelvis, and breathe out fully, you create a strong, braced flexion of the trunk. This is why people are often surprised by how much they feel their abs during the rounding phase — the band turns a mobility drill into something that doubles as a respiration and core-control exercise. You’re essentially getting a little free ab work woven into your warm-up.
On the arching phase, the band’s job flips. Instead of resisting you, it pulls you down into thoracic extension. For most people — especially anyone who isn’t naturally hypermobile — that downward pull helps achieve a deeper, more complete arch than they’d reach on their own. The result is that you both train the muscles that drive flexion and breathing while also coaxing the spine into a fuller extension. That combination of resistance and assistance in a single rep is the heart of why this works.
How to Set Up and Perform the Band-Resisted Cat-Camel
Start by selecting a light to moderate resistance band. You don’t need much tension here — this is a mobility drill, not a strength lift, and too heavy a band will simply pin you down and rob you of clean movement. Loop the band across your mid-back, positioning it in the thoracic region. A good landmark is roughly where a bra strap would sit, or simply the dead center of the upper-to-mid back. You specifically want to avoid placing it down on the lower back, which would change the loading, and you don’t want it riding up above the shoulders.
Take the two ends of the band and create thumb loops by hooking your thumbs through them. For most people, thumb loops give the best control and keep the band anchored cleanly. If you’re on the shorter side and the band is too long, you can simply grab the whole band in your hands instead — either approach works as long as the tension stays over the thoracic spine.
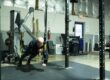
Get into a quadruped position: hands and knees on the floor, just as you would for a standard cat-camel. Pay attention to your lower body here. Keep your knees in line and your feet relatively even rather than letting them drift together, which tends to drive unwanted external rotation at the hips. With your base set, you’re ready to move.
Begin by arching your back as hard as you comfortably can, letting the band pull you down into that extended position. Inhale as you drive into the arch. Then reverse the motion: reach your hands out in front of you, drive your mid-back up into the band, round through the thoracic spine, tuck the pelvis underneath you, and exhale fully as you reach. Move deliberately. Inhale and arch, drive up into the band; exhale and round, reaching and pulling away from the band’s resistance. The emphasis is on segmenting the spine — moving it bit by bit rather than as a single hinge — and syncing each phase with your breath.
Common Mistakes to Avoid
The most frequent error is placing the band incorrectly. If it drifts down to the lumbar spine or up over the shoulders, you lose the targeted thoracic effect. Take a moment at setup to confirm it’s sitting across the mid-back.
A second common mistake is using too much band tension. Because this looks like a mobility drill, people sometimes assume more resistance equals more benefit, but a heavy band restricts your ability to move cleanly and segment the spine. Stay light enough that you can move smoothly through both phases.
Rushing the breath is another issue. Much of the value here lives in the respiration cycle — the full exhale on the reach that engages the abdominal wall and the inhale that supports the arch. If you’re racing through reps, you’re skipping the part that makes the banded version special. Slow down and let each breath drive the movement.
Finally, watch the lower body. Letting the feet collapse together or the knees drift can introduce hip rotation that distracts from the spinal work you’re after. Keep that quadruped base stable and even.
Programming: Reps, Sets, and Where It Fits
This is a low-volume, high-quality drill. A productive starting point is eight to ten reps for one to two sets, with the focus squarely on the breath cycle, the reach, and unhurried, controlled movement. You don’t need to grind through endless reps; you’re looking for a noticeable change — a sense that things have opened up and your mid-back feels more free. As soon as you feel that shift, you’ve accomplished what the drill is meant to do.
There are several smart ways to slot this into a program. It works beautifully as part of a warm-up, especially before upper-body training days or for athletes who depend heavily on thoracic mobility. It’s equally valuable as recovery or movement work on an off day, and because all you need is a band and a few feet of floor, you can do it literally anywhere — at the gym, at home, or while traveling.
One of its best uses is as a filler exercise. If you want to layer mobility into your main work without adding training time, pair this with your big, bang-for-your-buck compound lifts. Performing a set of band-resisted cat-camels in the rest period between sets of pressing, rowing, or even lower-body work lets you accumulate quality mobility volume while the heavy work does its job. This kind of intelligent pairing is a hallmark of efficient program design and one of the easiest ways to make mobility a consistent habit rather than an afterthought.
Who Should Use This Drill
The band-resisted cat-camel earns a place in a wide range of training programs. Powerlifters and strength athletes benefit from the improved thoracic extension that supports a stronger, more stable bench press setup and cleaner overhead positions. Combat sports athletes — wrestlers, grapplers, and fighters in MMA, BJJ, and boxing — rely on a mobile, resilient mid-back for the constant scrambling, posturing, and rotational demands of their sport, and this drill helps keep that region healthy and capable.
Swimmers, whose stroke mechanics demand enormous thoracic and shoulder mobility, can use it to maintain extension and serratus function. Golfers, who need a rotating, freely moving upper back to generate clubhead speed without overloading the lower back, are well served by the same qualities. Youth and developing athletes benefit from learning early how to control their spine segment by segment and coordinate movement with breathing. And for the everyday general-fitness client who spends the workday hunched at a desk, this is one of the most accessible ways to undo some of that accumulated stiffness and feel better in daily life.
In short, anyone who has gotten bored or under-challenged by the standard cat-camel, and anyone who needs to assist their body into ranges of motion that don’t come easily, is a strong candidate. Bands are a wonderful tool for exactly this purpose: when you’re trying to improve mobility, having an aid that gently pulls you into a position you couldn’t quite reach on your own makes the drill more effective and the progress more tangible.
Final Thoughts
The band-resisted cat-camel is proof that a small, thoughtful modification can breathe new life into a tired exercise. By adding a band across the thoracic spine, you transform a passive bodyweight drill into one that resists your rounding, assists your arching, recruits your serratus and obliques, and ties everything together through controlled breathing. It’s cheap, portable, scalable, and useful for nearly every population — from powerlifters and fighters to swimmers, golfers, and desk-bound clients just trying to move better.
Give it a try as a warm-up before your next upper-body day, as a filler between your main lifts, or as standalone recovery work. Keep the reps quality, follow the breath, and let the band do its work. You’ll likely find, as many lifters do, that your mid-back simply feels better afterward — and that’s the whole point.